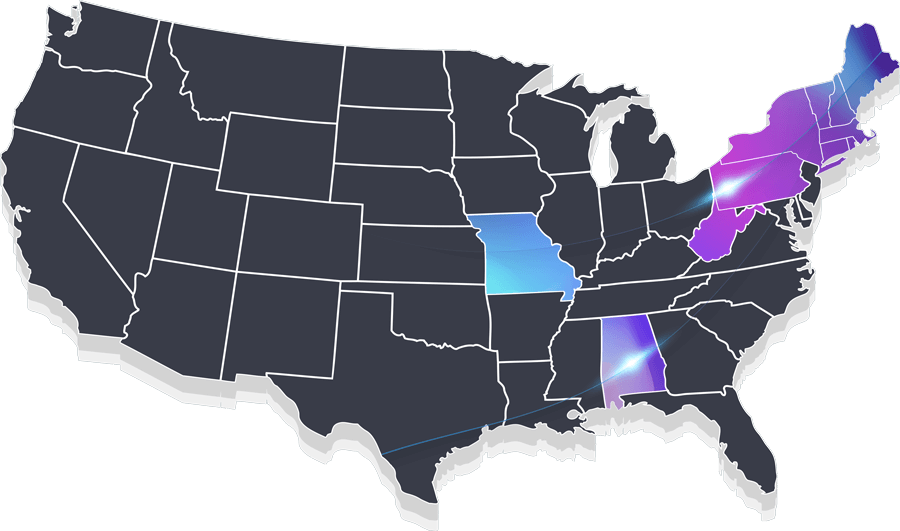
Installation FAQs

Installation Self Troubleshooting Tips

Installation Help

Cable Modem Self Installation

Our modems come in various shapes and colors, but the setup process is virtually identical, no matter which modem was delivered to you.

Cable Modem Self Installs

1. Connecting the Coax Cable

Connect the enclosed coax cable to an activated cable outlet in your home. Connect the other end of the coax cable to the coax port on the cable modem/router. Hand tighten the connectors to not damage the cable modem or the jack.

2. Powering Your Modem

Plug the power cord into the back of the modem and then into the closet power outlet or strip. The power light should come on and the other lights will start coming on.  The lights on the cable modem will start blinking and should become solid as the modem activates.  Be sure the cable is connected before powering on.


Cable Modem Ports

3. Connecting the Ethernet Cable

Connect the supplied ethernet cable to the port on the back of the modem.  Then connect the other end of the ethernet cable to your computer or router’s WAN port. This should make the Link light start blinking. This means the modem has connectivity.  Make sure the modem lights are solid before turning on your router or computer

Cable modem information4. Connecting Your Devices

If you have a modem router combo the Wireless SSID and Pre-shared Key should be listed on the modem.  It should be entered into your device just as it shows on the cable modem.

5. Trouble Shooting

If your service is not working after these steps are completed give our tech support a call at: 1-833-683-5261.

Can I connect multiple devices to my OTELCO Connection?

You can connect as many devices as you like to your OTELCO network. That being said, we recommend you first use the OTELCO bandwidth calculator to make sure you have enough bandwidth.

Click Here for the OTELCO Bandwidth Calculator

Can I still use the telephones I have now with DSL service?

Yes! We will provide you with special filters that you install on each jack where you have a telephone. This filter separates DSL signals from phone service. Depending upon the current wiring installation in your home, inside wiring may or may not be required.

DSL Self Installation

Our modems come in various shapes and colors, but the setup process is virtually identical, no matter which modem was delivered to you.

1. Plugging in the DSL Filter

If you have been provided with DSL filters, go ahead and plug those into every phone jack that goes to a phone, fax machine, or answering machine. Then plug your phone back into the filter and make sure it still works.

The filter pictured bottom is also a splitter. If you want to have a phone and your DSL modem for your Internet served from the same phone jack, you can use this type. The black port which has a symbol of a phone goes to your phone, fax, or answering machine. The white port with the computer symbol goes to your DSL modem.  In certain areas you will not need a filter as the filtering is done outside. But if you have used them in the past you will probably still need them. They do go bad and many stores carry them in case you don’t have one. Your service will work without these regardless, but you may have issues when you get a phone call. Never put the filter side on the line going to the DSL modem as it will block the DSL signal.


2. Connecting the Modem

Plug the phone line into the DSL port. Plug your computer or your wireless router (if you don’t have a wireless router, we can provide one) into one of the yellow ports ( usually labeled LAN or ETH).  Then plug the power into the barrel jack, usually labeled power.

DSL Modem Ports

If the lights don’t come on, make sure the power button (on the side of the pictured modem) is pressed in. On other modems, it’s a toggle switch on the back. Once the lights come on it can take up to 5 min for the modem to fully connect and be ready to get online.

  1. Connecting to Wireless (for the all in one units) – Look at the bottom of the modem (the foot of the modem). There you can find a tag that has the Wi-Fi SSID, this is your network name, search for and select this name on your Wireless Device (Laptop, Cellphone, Chromecast etc.). Then enter the Wi-Fi Key (password) which is also found on the same tag. If you have trouble seeing this tag, we suggest using a cellphone camera and zooming in, or a magnifying glass.
  2. Troubleshooting – If your Internet light didn’t come on, or even if it did and you cannot get onto the Internet. Please copy down the “MAC:” that is listed on the label on the bottom, it is 12 characters long and then give our tech support a call at: 1-833-683-5261.

Modem information located on the bottom or foot of the modem3. Connecting to Wireless (for the all in one units)

Look at the bottom of the modem (the foot of the modem). There you can find a tag that has the Wi-Fi SSID, this is your network name, search for and select this name on your Wireless Device (Laptop, Cellphone, Chromecast, etc.). Then enter the Wi-Fi Key (password) which is also found on the same tag. If you have trouble seeing this tag, we suggest using a cellphone camera and zooming in, or a magnifying glass.

4. Troubleshooting

If your Internet light didn’t come on, or even if it did and you cannot get onto the Internet. Please copy down the “MAC:” that is listed on the label on the bottom, it is 12 characters long and then give our tech support a call at 1-833-683-5261.

5. Logging into Your Modem

If you want to log into the modem yourself, you may point your browser to: http://10.255.252.1 (try https if that doesn’t work). Then when prompted:

Username: enduser

Password: OtelcO

Gigabit Internet

Is a gigabit internet service really equal to 1,000 Megabits per second (Mbps)?

The answer is yes and no.  At the origination point of the Internet signal, the capacity is a true 1,000 Mbps, as the signal travels through the various pieces of equipment on a network, there can be a minimal reduction in capacity to about 940 Mbps when it reaches your home or business.

Whether we’re talking 940 Mbps or a full gig (1,000 Mbps) it’s still nearly ten times faster than 100 Mbps service and 250 times higher than 4 Mbps – which was the FCC standard just 10 years ago.

Your computer needs a Gig Ethernet port. There are other factors on your device that can affect your speeds like the operating system, processor, memory, network adapter.

1 Gig seems like a lot, but is it really?

Consider this.  Today the FCC standard is 25 Mbps download and 3 Mbps upload.  According to the Commission, 25/3 should meet the needs of the average household with a maximum of 4 users OR connected devices.  A device is anything in your home connected to the Internet, cell phones, TVs, tablets, computers, smart home devices, virtual assistants.

Since many of the devices in your home are using the Internet even when idle, the number of users becomes less important than the number of devices.  Based on the FCC standard, you need 25/3 for every four devices.  How many Internet-connected devices are in your home?

Let’s look at a 2-person household where both have a personal computer and cell phone as well as a work computer and cell phone.  They each have a tablet, they each have an e-reader, there is one Internet-ready TV, 2 personal assistants (Alexa, Google Assistant, etc.), 2 security cameras, and 10 smart plugs.  That amounts to 23 devices – regardless of the number of users.  According to the FCC’s standard, this household would need 150 Mbps for everything to have the bandwidth it needs at any given time. Learn more about how to calculate how much speed you need.

When you consider a couple of students and their connected devices added to the mix, plus the fact that so many of us are using Zoom and other video conferencing platforms for working and schooling from home, it’s easy to see how 300 Mbps or more can get eaten up pretty quickly.


How do I set up my additional mail boxes?

Step 1:Click on Manage Mailboxes  

Step 2:Click the blue button on the right labeled New Mailbox


Step 3:Complete the form and click Create Mailbox


And you are done! From here you can Edit you Mailbox(es),

or repeat the steps to create another new mailbox.


How to Configure IMAP/POP Server Settings

For IMAP connections

Server name:  mail.otelco.net

Server port:  993

Username:  your full email address (@otelco.net, @iland.net, @hopper.net, @myottmail.com, @sacoriver.net, etc.)

Connection Security:  SSL/TLS

Authentication Method:  Normal Password

 For POP3 connections

Server name:  mail.otelco.net

Server port: 995

Username:  your full email address (@iland.net, @hopper.net, @myottmail.com, @sacoriver.net, etc.)

Connection Security:  SSL/TLS

Authentication Method:  Normal Password

 Outgoing server settings (SMTP):

Server name:  mail.otelco.net

Server port:  587

Username:  your full email address (@iland.net, @hopper.net, @myottmail.com, @sacoriver.net, etc.)

Connection Security: STARTTLS (SSL/TLS may work in some mail clients)

Authentication Method:  Normal Password

How to Connect to Wifi in Windows 10

1. Select the network icon from the notification area to open the network flyout. If your device can connect to a wireless network through a wireless adapter, you will see a signal/broadcast radio wave icon with a star above it.

  • If your device is wireless capable, but the icon is missing, then go to “Settings > Personalization > Taskbar > Select which icons appear on the taskbar” and slide the switch next to “Network” to “On.”
  • You can also go to “Settings > Network & Internet > Wi-Fi > Show available networks”.
Step One: Select the network icon from the notification area to open the network flyout. If your device can connect to a wireless network through a wireless adapter, then you will see a signal/broadcast radio wave icon with a star above it.

Picture courtesy of wikiHow.

2. Make sure Wi-Fi is turned on. See if the “Wi-Fi” tile is colored at the bottom of the pane.

Sep 2: Make sure Wi-Fi is turned on. See if the "Wi-Fi" tile is colored at the bottom of the pane.

Picture courtesy of wikiHow.

3. Click or tap the network name (SSID/service set identifier) you want to connect to.

Step 3: Click or tap the network name (SSID/service set identifier) you want to connect to.

Picture courtesy of wikiHow.

4. Decide whether to always connect to the network automatically when it is in range. Either check or uncheck the box next to “Connect automatically.”

Step 4: Decide whether to always connect to the network automatically when it is in range

Picture courtesy of wikiHow.

5. Press the Connect button.

Step 5: Press the Connect button.

Picture courtesy of wikiHow.

6. Enter the network password.

Step 6: Enter the network password.

Picture courtesy of wikiHow. 

    • If the router is WPS enabled, press the button on the router to connect.

7. Click or tap Next.

Step 7: Click or tap Next.

Picture courtesy of wikiHow.

8. Success! Now choose your sharing settings. You’ll be asked, “Do you want to allow your PC to be discoverable by other PCs and devices on this network.” Clicking away will choose the “No” option.

Last Step: Success! Now choose your sharing settings. If on your home or workplace network, select Yes, otherwise choose No.

Picture courtesy of wikiHow.

  • If on your home or workplace network, select Yes, otherwise choose No.
How to Connect Your Android Device to Your OTELCO Network

This guide will show you how to access a wireless network. Most wireless networks require a password to get access. Make sure to have this password ready before you start the guide.

1. Slide up the bottom menu.

Step 1: Slide up the bottom menu.

Picture courtesy of helpforsmartphone.com.

2. Select Settings.

Step 2: Select Settings.

Picture courtesy of helpforsmartphone.com

3. Select Network & Internet

Step 3: Select Network & Internet

Picture courtesy of helpforsmartphone.com

4. Select Wi-Fi.

Step 4: Select Wi-Fi.

Picture courtesy of helpforsmartphone.com

5. Turn on Use Wi-Fi.

Step 5: Turn on Use Wi-Fi.

Picture courtesy of helpforsmartphone.com

6. Select the wireless network you want to connect to

Step 6: Select the wireless network you want to connect to

Picture courtesy of helpforsmartphone.com

7. Enter the Wi-Fi password and select Connect.

Step 7: Enter the Wi-Fi password and select Connect.

Picture courtesy of helpforsmartphone.com

8. You are now connected to the Wi-Fi network.

Step 8: You are now connected to the Wi-Fi network.

Picture courtesy of helpforsmartphone.com

How to Connect Your Fire Stick to Your OTELCO Network

1. Connect the Amazon Fire Stick to your TV. The Amazon Fire Stick connects directly to an HDMI port on the back of your TV. Turn on your TV and make sure you have the correct source input selected.

Step 1: Connect the Amazon Fire Stick to your TV.

2. Connect the Fire Stick to power. Make sure the Fire Stick’s micro-USB power cord is plugged into the Fire Stick, and the other end of the USB cord is attached to the included power adapter and plugged into an open power outlet. If your TV has an open USB port, you can plug it into the TV directly instead of using the included adapter.

  • Use the included adapter and plug the Fire Stick directly into a power outlet on the wall if you see a message saying the Fire Stick is getting insufficient power.
Step 2:

Picture courtesy of wikiHow.

3. Select Settings. Use the directional buttons on the remote to go to the very top of the Home screen, then select “Settings,” which is at the far right of the options at the very top of the screen.

  • Press the Home button on the controller to go to the Home menu if you are not already on the main Home screen. It is the button with the outline of a house on it.
Step 3: Select Settings

Picture courtesy of wikiHow.

4. Select Network. It is the second option in the menu with the icon of three curved lines that resemble a Wi-Fi signal. Use the directional buttons on the remote to go down, and to the right to highlight the “Network” option in yellow, then press the Select button in the center of the remote. The Fire Stick will automatically start scanning for nearby networks.

Step 4: Select Network.

Picture courtesy of wikiHow.

5. Select your preferred network. As soon as you see the name of your home network in the list of nearby networks, use the directional buttons on the remote to highlight it in yellow, and then press the Select button in the center of the remote to select it.

  • If you do not see your preferred network, select “Rescan” at the bottom of the list.
Step 5: Select your preferred network

Picture courtesy of wikiHow.

If your preferred network is hidden, select “Join Other Network” at the bottom of the list and manually type the name of the network you want to connect to.

6. Enter the Wi-Fi network password. If your network has a password, use the remote to navigate the on-screen keyboard and type the password for your Wi-Fi network.

  • If your home network is not password protected, it will attempt to connect automatically.
Step 6: Select your preferred network

Picture courtesy of wikiHow.

7. Select Connect. It is in the lower-right corner of the on-screen keyboard. The Fire Stick will then connect to your home Wi-Fi network. Once the Fire Stick is connected, it will say “Connected” below the network’s name on the list of nearby networks.

  • You can press the Home button on the remote to return to the Fire Stick’s Home screen.
Step 7: Select Connect.

Picture courtesy of wikiHow.

How to Connect Your iOS Device to Your OTELCO Network

1. Tap the Settings icon to open the iOS Settings menu.

2. Tap WiFi.

Step 2: Tap WiFi.

Picture courtesy of Westnet

3. Select the name (SSID) of your WiFi network from the list of available connections on your iOS device.

Step 3: Select the name (SSID) of your WiFi network from the list of available connections.

Picture courtesy of Westnet.

4. Enter your WiFi password and then tap Join to finish. Your iOS device should remember your password for you from now on.

Step 4: Enter your WiFi password and then tap Join to finish

Picture courtesy of Westnet.

How to Connect Your Mac to Your OTELCO Network

You can use the Wi-Fi menu to quickly connect to a nearby wireless network.

You can use the Wi-Fi menu to quickly connect to a nearby wireless networks from your mac..

Picture courtesy of apple.com.

1. Click the Wi-Fi icon (  or  ) in the menu bar. 

2. If Wi-Fi is off, choose “Turn Wi-Fi on.”

3. Select a nearby Wi-Fi network from the list

4. Enter your password.

  • Networks that have a lock icon next to their name require a password. After you select your network, enter the network password when you are prompted. If you do not know the network password, check with the owner of the Wi-Fi network you are trying to join, or check the bottom of your router or router-modem combo.

If Your Network is Not Listed

If you do not see your network listed, make sure it is nearby and that others can connect to it. It could also be a “hidden” network. You can connect to a hidden network by choosing “Join other networks” and entering the name of the network you are trying to use.

The strength of each nearby network is shown next to its name. More darkened bars indicate a stronger network connection.

If You Do Not See the Wi-Fi Menu

You can enable and disable the Wi-Fi menu from the Network pane of System Preferences.

You can enable and disable the Wi-Fi menu from the Network pane of your Mac’s System Preferences.

Picture courtesy of Apple.com

1. From the Apple menu, choose System Preferences.

2. Click Network in the System Preferences window.

3. Select Wi-Fi in the list of available network connections.

4. Select (check) the option to “Show Wi-Fi status in menu bar.”

How to Connect Your Roku to Your OTELCO Network

Once you have your Roku device connected to power and powered on, you will be guided through a setup process that includes connecting the stick or box to the internet.

Step 1: During setup for Roku boxes and TVs, you will be prompted to choose Wired or Wireless for connection to a router and the internet.

Picture courtesy of Lifewire.com

1. During setup for Roku boxes and TVs, you will be prompted to choose Wired or Wireless for connection to a router and the internet.

  • If you select Wired, do not forget to connect your Roku box or TV to your router using an Ethernet cable. Your Roku device will directly connect to your home network and the internet. Once confirmed, you can continue with the remaining setup steps for your Roku device.
  • If you select Wireless, there are additional steps to complete the connection process before moving on to the rest of the Roku device setup steps. For a first-time wireless connection setup, your Roku device will automatically scan for any available networks within range. Follow the steps below to connect your roku to your wireless OTELCO network.
For a first-time wireless connection setup, your Roku device will automatically scan for any available networks within range.

Picture courtesy of Lifewire.com.

Step 2: Once the list of available networks appears, find and choose your wireless network from the list of those available.

Picture courtesy of Lifewire.com

2. Once the list of available networks appears, find and choose your wireless network from the list of those available.

  • If you do not see your home network, select Scan again to see all networks and see if it appears on the next listing.
  • If the Roku device cannot find your network, the Roku and router may be too far apart. If you have the option of connecting to your router using ethernet, that is one solution. Another is to move the Roku device and router closer together or add a wireless range extender or another option.

3. Once you choose your network, it will check to see if the Wi-Fi and internet connection are working properly. If so, then you can proceed. If not, make sure you have chosen the correct network.

Step 3: Once you choose your network, it will check to see if the Wi-Fi and internet connection are working properly.

Picture courtesy of Lifewire.com

4. When connected to your OTELCO Network, your Roku device will automatically search for any available firmware/software updates. If any are found download and install them.

5. Your Roku device may reboot/restart at the end of the software/firmware update process.

6. Wait for this process to finish before moving on to additional setup steps or viewing.

I have ADSL and now I have noise on my phone?

Make certain that every phone jack is equipped with the filters that OTELCO provided.  You do NOT need a filter on the jack that supplies the DSL modem.

If I am unable to find the answer to my questions online, where can I go for more assistance?

There are several easy ways to reach out to our customer service and 24/7 support team:

Setting up your OTELCO Voicemail

Voice Mail is easy to use, private and reliable.  With no equipment to buy or clutter your desk.  Voice Mail answers your call if you are not home, or already on the phone.  When you are unable to take the call, callers are forwarded to your Voice Mail where they can leave a message for you.

Your Voice Mail messages can be retrieved any time, anywhere, from any touch-tone phone.

Retrieving your Voice Mail Messages

From your own touch-tone phone:

  1. Enter *99
  2. Enter your 4-digit PIN when prompted.
  3. Follow the voice instructions.

From any other touch-tone phone:

  1. Call 660-834-6246
  2. Enter your 10-digit telephone number.
  3. Enter your 4-digit PIN when prompted.
  4. Follow voice instructions.


What are the server settings for my email?

For IMAP connections

Server name:  mail.otelco.net

Server port:  993

Username:  your full email address (@otelco.net, @iland.net, @hopper.net, @myottmail.com, @sacoriver.net, etc.)

Connection Security:  SSL/TLS

Authentication Method:  Normal Password


For POP3 connections

Server name:  mail.otelco.net

Server port: 995

Username:  your full email address (@iland.net, @hopper.net, @myottmail.com, @sacoriver.net, etc.)

Connection Security:  SSL/TLS

Authentication Method:  Normal Password


Outgoing server settings (SMTP):

Server name:  mail.otelco.net

Server port:  587

Username:  your full email address (@iland.net, @hopper.net, @myottmail.com, @sacoriver.net, etc.)

Connection Security: STARTTLS (SSL/TLS may work in some mail clients)

Authentication Method:  Normal Password

Wireless Internet Self Installation

Our Fixed Wireless Service comes in a variety of equipment types depending on what tower you connect to and what your signal needs are.  For that reason, these “Self-Install” instructions will depict several photos showing the various devices issued to customers.  Carefully review each photo and select the device we provided for your specific install. Then follow the instructions for installing each device we provided.

Installing POE – “Power of Ethernet” Device

1. Identify your POE using the figures 1, 2 or 3 in the pictures below.

P.O.E Figure 1

      P.O.E Figure 1

P.O.E Figure 2

           P.O.E Figure 2

P.O.E Figure 3

                            P.O.E Figure 3

2. Plug the Ethernet cable that comes in through the wall of your house from the outside into the proper port indicated by the picture of the POE we provided you. It will look like a large phone cable plug.

3. Locate the short Ethernet cable we provided you and plug one end into the proper port indicated by the same photo.

4. Plug the other end of the short cable into your PC Ethernet port If using the connection on a single desktop type of PC. If you are using a wireless router then plug the other end of the short cable into the “Internet Port” on your Wireless Router.  See step 5 for further clarification.

5. Plug short Ethernet cord (LAN) cable into the wireless router as shown below. Also, plug the router power cable in. The power cable is a small power block with a 2-prong household plug on one end and a round straight connector on the other.

Wireless router Ports

6. Now that you have all your cables ran, and your router powered up. You should now plug the power cable that came with the POE device. This will power up the outside equipment and your router will make a connection to the Internet.


7. After a minute or two of booting up and synchronizing observe the lights found on the top right side of the wireless router.  The power light, WLAN light and Internet light (earth like symbol) should all be solid green. If they are then you are ready to connect your laptop via Wi FI.


8. The outside technician would have configured your wireless router for you before giving it to you. They configure and test it with the outside equipment during the outside installation portion of their visit.  During the configuration process they would have set up an SSID and a password you will use to connect your laptop to the WI FI.  The tech has written that info on the two lines right below this sentence.

WI FI – SSID = _________________________ Password = ________________________

It is highly advised to keep this information on file for future use.


9. You are now ready to connect by scanning for available Wi-Fi networks. If you are not aware of how to do this, you may either call our NOC for assistance or refer to your computer user manuals.  Once you have scanned for available networks, look for the SSID name written above in step 8, select the SSID and click “connect” when prompted type in the password also found above. Type it exactly as written.  If you have trouble getting connected you may call our NOC at the number found at the top of these instructions.


10. You have now completed the “Self-Install” instructions for your Fixed Wireless Connection using a laptop and WI FI


11. If you are using a stand-alone computer and not a wireless router, then you need only plug the short cable (LAN) that we provide directly into the Ethernet port on your desktop PC. Steps 7 – 10 are not needed as you are not using Wi-Fi to connect that PC.

When using a Stand-Alone desktop PC you would plug the short LAN cable coming from the POE into the back of your desktop machine into the Ethernet port. There would not be any SSID or password needed at that point.